Q-Line Flow Cell Wash Kit (Q-EXP-WSH004) (Q_WSH004_revA_01Jun2026)


GridION: Protocol
Q-Line Flow Cell Wash Kit (Q-EXP-WSH004) V Q_WSH004_revA_01Jun2026
For Research Use Only. Not for use in diagnostic procedures.
Manufacturer: Oxford Nanopore Technologies, Gosling Building, Edmund Halley Rd, Oxford Science Park, Oxford, OX4 4DQ, United Kingdom
FOR RESEARCH USE ONLY.
NOT FOR USE IN DIAGNOSTIC PROCEDURES.
Contents
Introduction to the protocol
Washing a flow cell
Overview
For Research Use Only. Not for use in diagnostic procedures.
Manufacturer: Oxford Nanopore Technologies, Gosling Building, Edmund Halley Rd, Oxford Science Park, Oxford, OX4 4DQ, United Kingdom
1. Overview of the protocol
The Q-Line Flow Cell Wash Kit enables multiple sequential runs from one flow cell by removing the first library and preparing the flow cell for a subsequent library. This maximises run time, particularly in cases where less data per library is required. Following the wash step, Storage Buffer can be introduced into the flow cell, allowing storage of the flow cell before subsequent library additions. The Q-Line Flow Cell Wash Kit is compatible with Q-Line MinION DNA Flow Cells (Q-FLO-MIN106, Q-FLO-MIN114) and provides enough material for six reactions.
Although the wash procedure should remove 99.9% of the library, some residual DNA may remain on the flow cell. You may prefer to barcode your libraries when using the Q-Line Flow Cell Wash Kit so reads from different libraries can be separated.
2. Equipment and consumables
Materials
- Q-Line Flow Cell Wash Kit (Q-EXP-WSH004)
Equipment
- P1000 pipette and tips
- P20 pipette and tips
- Ice bucket with ice
Q-Line Flow Cell Wash Kit contents (Q-EXP-WSH004)
| Name | Abbreviation | Cap colour | Quantity | Minimum fill volume per vial (µl) |
|---|---|---|---|---|
| Wash Mix | WMX | Brown | 1 | 12 |
| Wash Diluent | DIL | Brown | 2 | 1,200 |
| Storage Buffer | S | Brown | 2 | 1,500 |
- Wash Mix (WMX) contains DNase I.
- Wash Diluent (DIL) contains the exonuclease buffer that maximises activity of the DNase I.
- The Storage Buffer allows flow cells to be stored for extended periods of time.
3. Washing a MinION Flow Cell
Materials
- Q-Line Flow Cell Wash Kit (Q-EXP-WSH004)
Equipment
- P1000 pipette and tips
- P20 pipette and tips
- Ice bucket with ice
Preparing to run the wash procedure
- This protocol assumes that the flow cell has already been used to run a library.
- The aim is to remove the initial library and prepare the flow cell for the loading of a subsequent library.
- The Q-Line Flow Cell Wash Kit contains all solutions required for removal of the initial library.
- After washing the flow cell, you can load a new library or store the flow cell at 4°C.
If you need to wash the flow cell in the middle of a run, cancel the assay in the Sequencing Software.
Under the flow cell position, click View run. 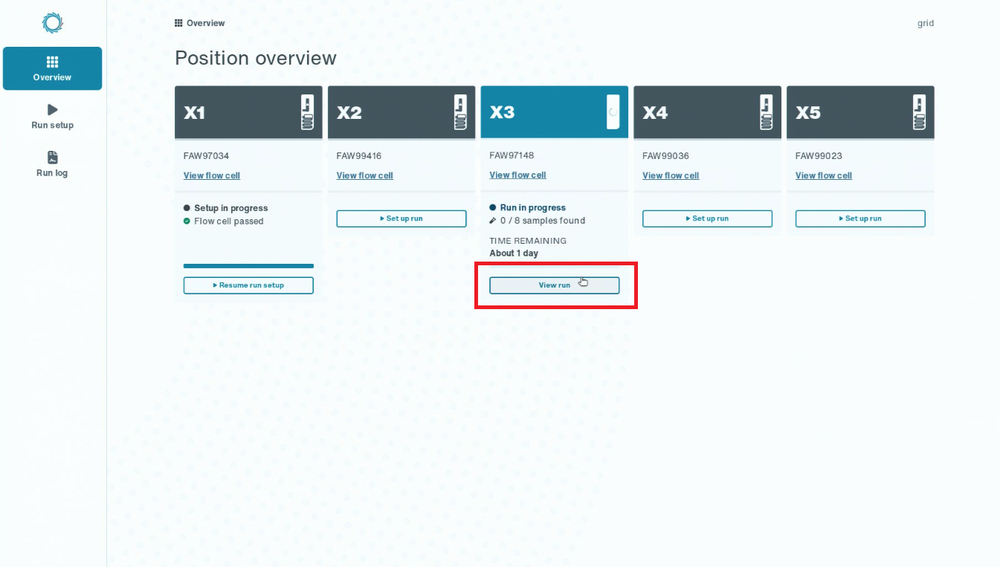
Then click Cancel run. 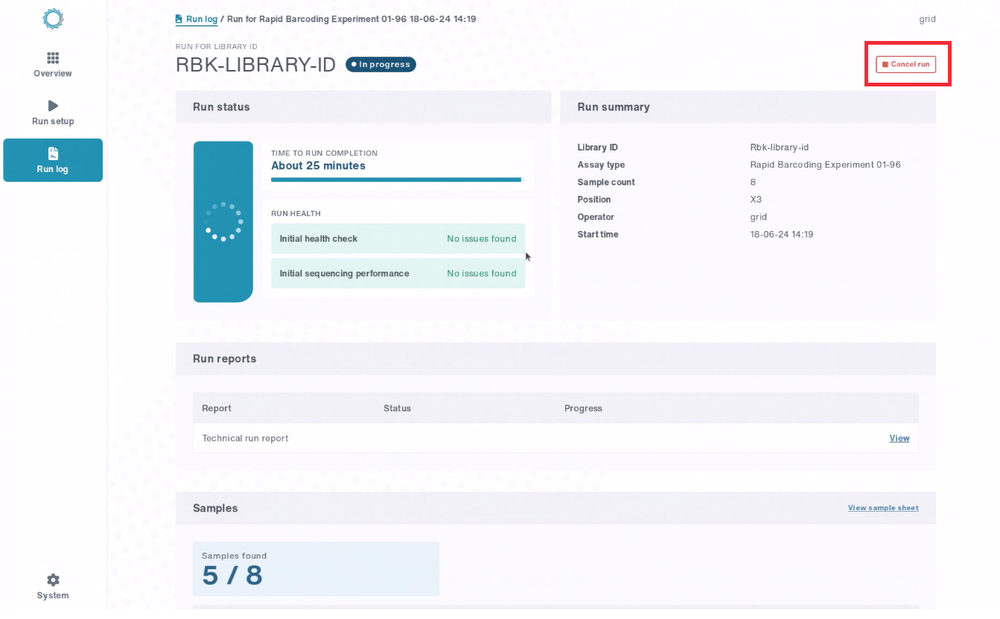
Place the tube of Wash Mix (WMX) on ice. Do not vortex the tube.
Thaw one tube of Wash Diluent (DIL) at room temperature.
Mix the contents of Wash Diluent (DIL) thoroughly by vortexing, then spin down briefly and place on ice.
In a fresh 1.5 ml Eppendorf DNA LoBind tube, prepare the following Flow Cell Wash Mix:
| Reagent | Volume per flow cell |
|---|---|
| Wash Mix (WMX) | 2 µl |
| Wash Diluent (DIL) | 398 µl |
| Total | 400 µl |
Mix well by pipetting, and place on ice. Do not vortex the tube.
Slide the flow cell priming port cover clockwise to open the priming port.
Note: The priming port cover is located next to the waste channel.
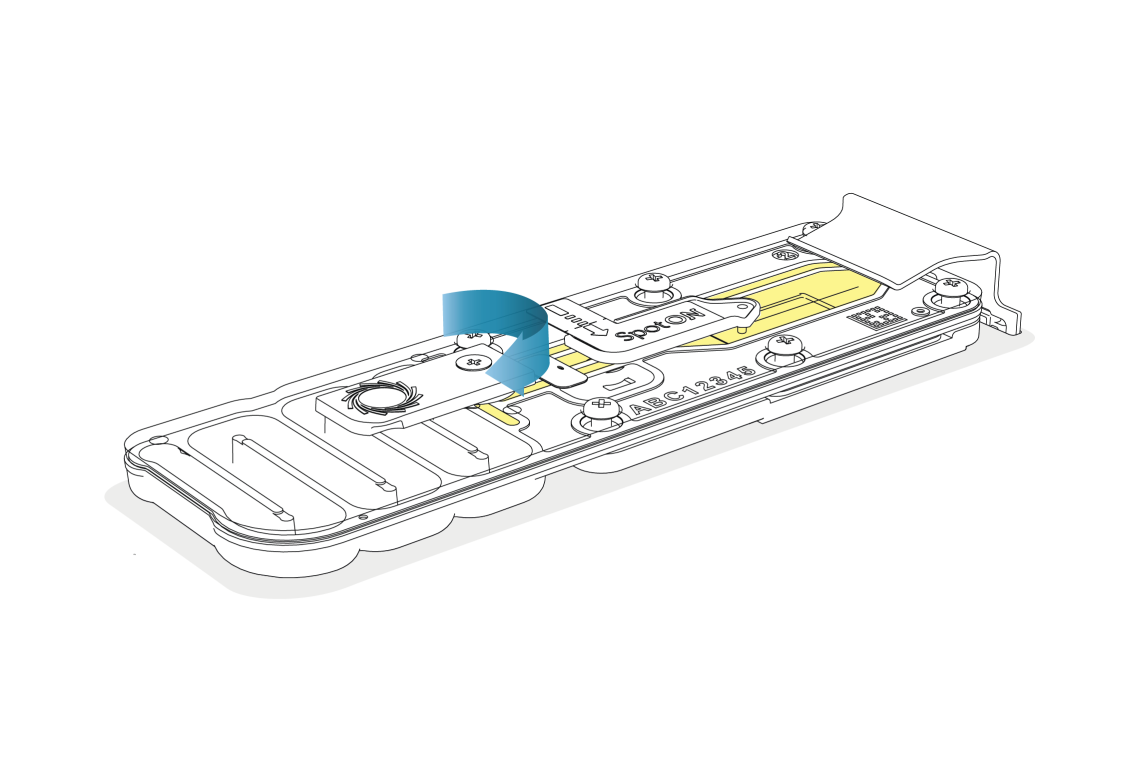
Take care when drawing back buffer from the flow cell.
Do not remove more than 20–30 µl, and make sure that the array of pores is covered by buffer at all times. Introducing air bubbles into the array can irreversibly damage pores.
After opening the priming port, remove any potential air bubbles under the cover by performing the following steps:
- Set a P1000 pipette to 200 µl.
- Carefully insert the tip into the priming port, holding the pipette perpendicular to the flow cell.
- Turn the wheel until the dial shows 220–230 µl to draw back 20–30 µl, or until you can see a small volume of buffer entering the pipette tip.
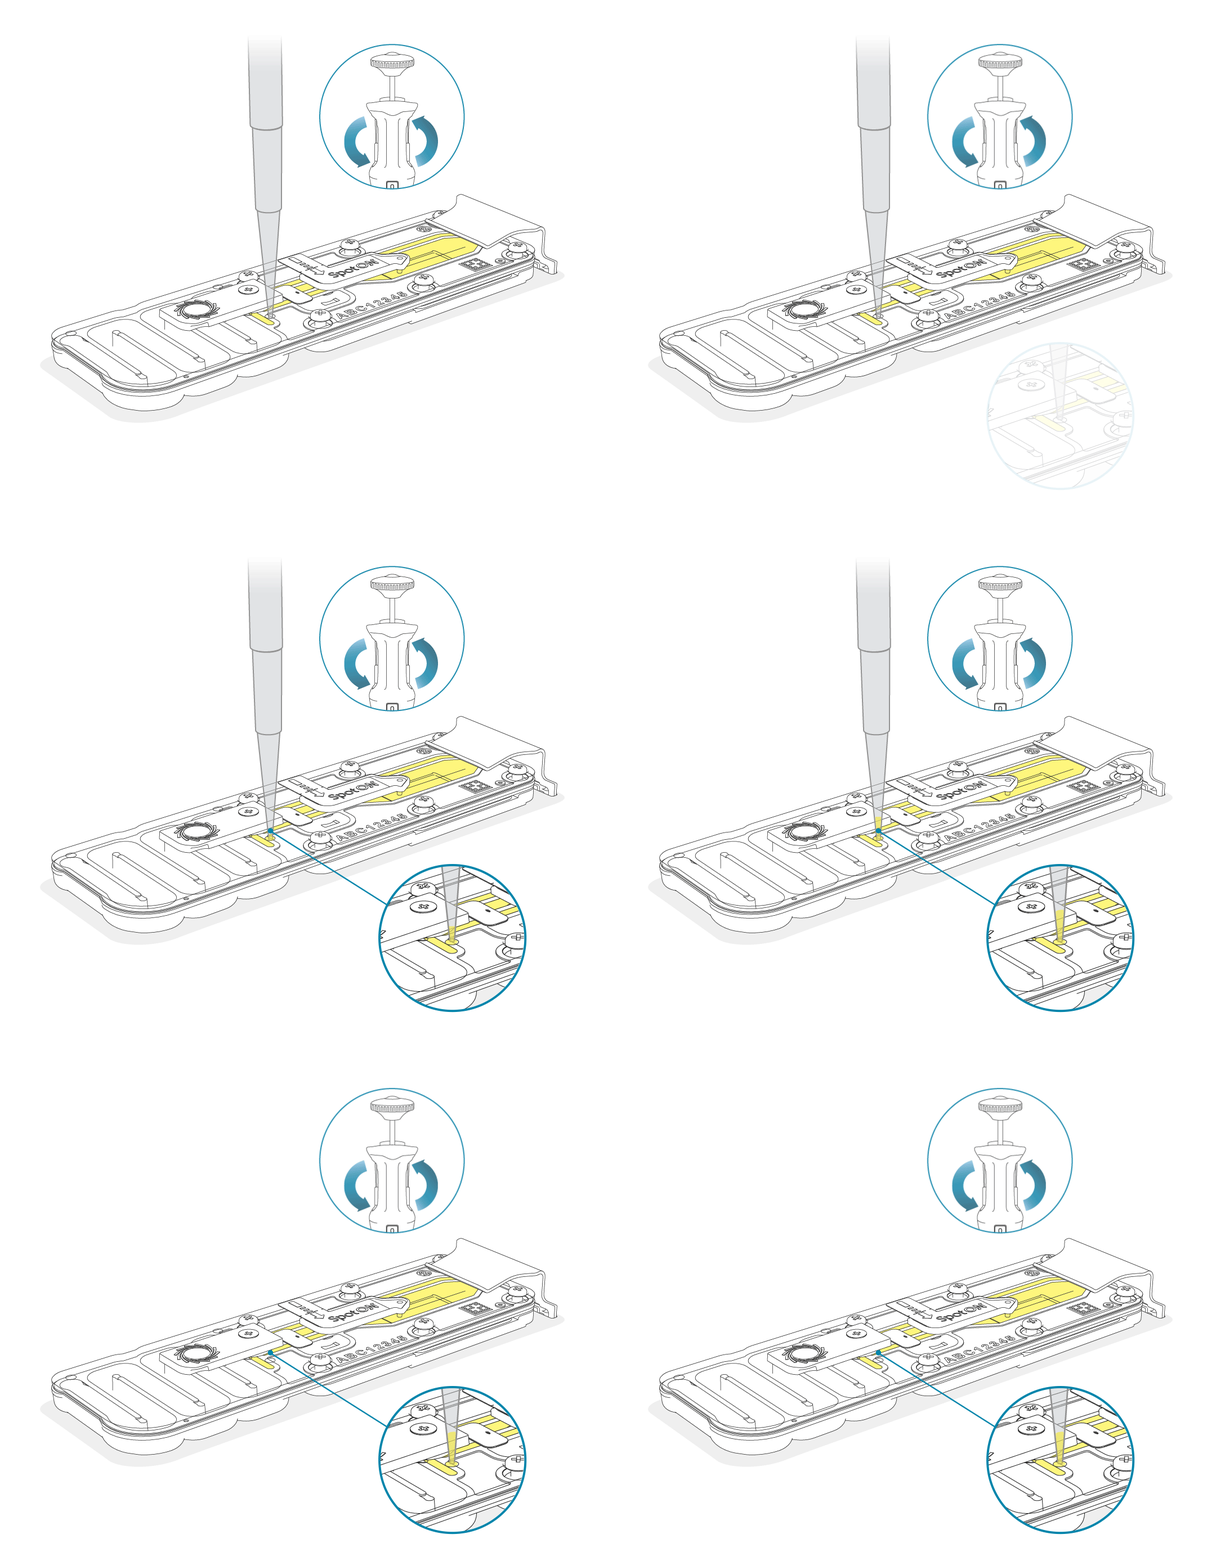
Note: Visually check that there is continuous buffer from the priming port across the sensor array.
Remove your prepared Flow Cell Wash Mix from ice and allow to come to room temperature immediately before loading onto the flow cell.
Slowly load 200 µl of the prepared Flow Cell Wash Mix into the priming port, as follows:
- Using a P1000 pipette, take 200 µl of the Flow Cell Wash Mix.
- Insert the pipette tip into the priming port, ensuring there are no bubbles in the tip.
- Push down the plunger very slowly (for approximately 10 seconds), leaving a small volume of buffer in the pipette tip.
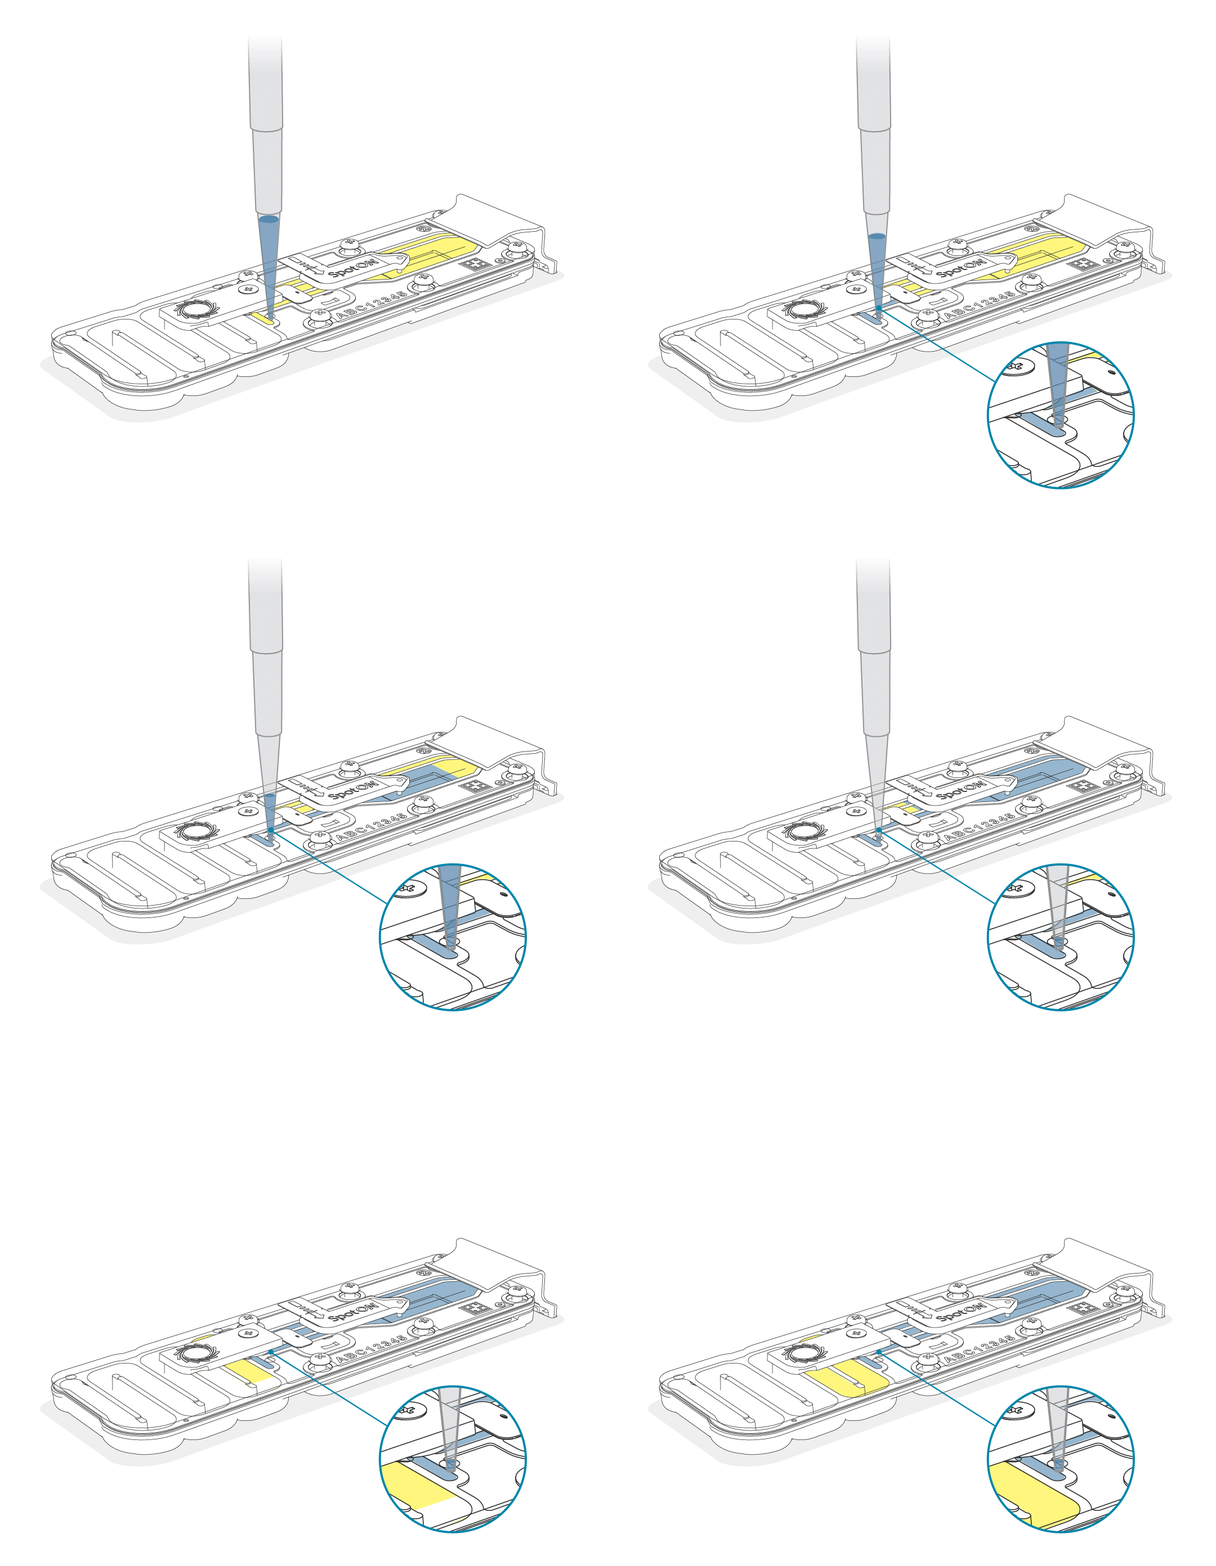
Leave the flow cell to incubate for 5 minutes.
Return the remaining Flow Cell Wash Mix to ice.
Once the incubation is complete, carefully load the remaining 200 µl of the prepared Flow Cell Wash Mix into the priming port, as follows:
- Using a P1000 pipette, take the remaining 200 µl of the Flow Cell Wash Mix.
- Insert the pipette tip into the priming port, ensuring there are no bubbles in the tip.
- Push down the plunger very slowly (for approximately 10 seconds), leaving a small volume of buffer in the pipette tip.
Close the flow cell priming port and incubate for 60 minutes.
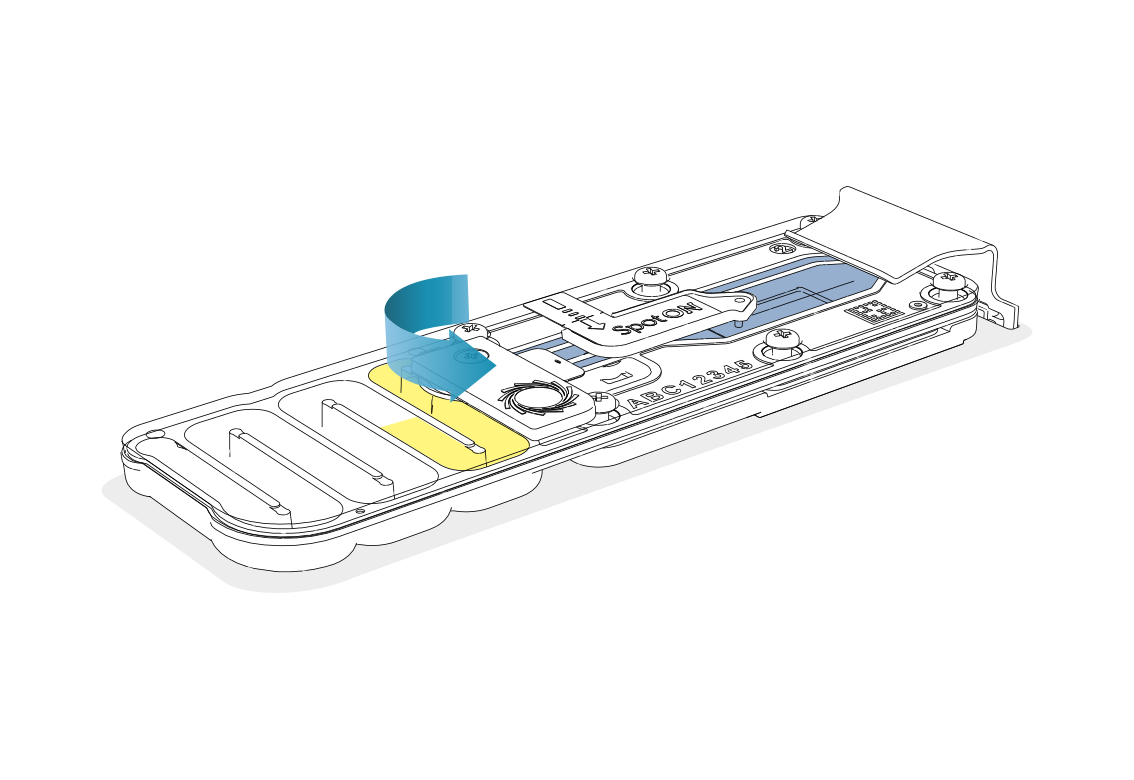
Once the incubation is complete, ensure that both the priming port and SpotON sample port are closed.
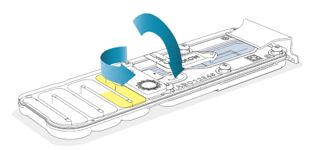
It is vital that the flow cell priming port and SpotON sample port are closed before removing the waste buffer.
Closing both ports prevents air from being drawn across the sensor array area, which would lead to a significant loss of sequencing channels.
Insert a P1000 pipette into waste port 1 and remove the waste buffer.
Note: As both the priming port and SpotON sample port are closed, no fluid should leave the sensor array area.
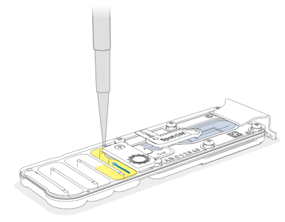
Thaw one tube of Storage Buffer (S) at room temperature.
Mix the contents thoroughly by pipetting, then spin down briefly.
Rotate the flow cell priming port cover clockwise so that the priming port is visible.
After opening the priming port, remove any potential air bubbles under the cover by performing the following steps:
- Set a P1000 pipette to 200 µl.
- Carefully insert the tip into the priming port, holding the pipette perpendicular to the flow cell.
- Turn the wheel until the dial shows 220–230 µl to draw back 20–30 µl, or until you can see a small volume of buffer entering the pipette tip.
Note: Visually check that there is continuous buffer from the priming port across the sensor array.
Slowly add 500 μl of Storage Buffer (S) through the flow cell priming port, as follows:
- Using a P1000 pipette, take 500 µl of the Storage Buffer.
- Insert the pipette tip into the priming port, ensuring there are no bubbles in the tip.
- Push down the plunger very slowly (for approximately 20 seconds), leaving a small volume of buffer in the pipette tip.
Close the priming port.
It is vital that the flow cell priming port and SpotON sample port are closed before removing the waste buffer.
Closing both ports prevents air from being drawn across the sensor array area, which would lead to a significant loss of sequencing channels.
Insert a P1000 pipette into waste port 1 and remove the waste buffer.
Note: As both the priming port and SpotON sample port are closed, no fluid should leave the sensor array area.
The flow cell can now either be reused or stored for up to 7 days at 4–8°C in the blister pack provided.
If you are storing the flow cell, we recommend running a flow cell check first to confirm sufficient flow cell health. If you are using the flow cell for an assay immediately, the required flow cell check will be completed during run setup.
Note: If you store the flow cell at 4–8°C, when you come to reuse it, remove the flow cell from storage and allow it to warm to room temperature for approximately 5 minutes.
For technical support
Contact Oxford Nanopore Technologies technical support at: support@nanoporetech.com
Last updated: 8/20/2026
Document options