Removal of short fragments with the Short Fragment Eliminator Kit (EXP-SFE001)

Extraction Method
Removal of short fragments with the Short Fragment Eliminator Kit (EXP-SFE001)
FOR RESEARCH USE ONLY.
Contents
Introduction
Materials
Key considerations before you begin
Method
Change log
Introduction
The Short Fragment Eliminator Kit (EXP-SFE001) is designed for the removal of short DNA fragments from a high molecular weight (HMW) gDNA sample. The kit contains the Short Fragment Eliminator (SFE) buffer, which has been optimised to remove fragments up to 25 kb, with fragments under 10 kb being almost completely removed.
We recommend users familiarise themselves with the Short Fragment Eliminator Kit (EXP-SFE001) know-how document where performance has been characterised on various gDNA samples.
Materials
- Short Fragment Eliminator (EXP-SFE001)
- 3–10 µg of HMW DNA in TE buffer (10 mM Tris-HCl, 1 mM EDTA, pH 8.0)
- Freshly prepared 80% ethanol in nuclease-free water
- 1.5 ml Eppendorf DNA LoBind™ tubes
- Qubit™ dsDNA BR Assay Kit (ThermoFisher Q32850) or equivalent QC check
- Qubit™ Assay Tubes (ThermoFisher Q32856)
- Eppendorf 5424 centrifuge (or equivalent)
- P200 pipette and wide-bore tips
- P100 pipette and wide-bore tips
- P20 pipette and wide-bore tips
- P2 pipette and tips
- Ice bucket with ice
- Heat block or water bath at 37°C
- Timer
- Qubit fluorometer (or equivalent for QC check)
- Shaking heat block (optional)
- FemtoPulse™ systems (alternative: pulse-field gel and Fragment analyzer)
Key considerations before you begin
1. DNA fragment length: We recommend the Agilent FemtoPulse system to evaluate the fragment length profile of gDNA.
We recommend the use of unsheared DNA for size-selection, as shearing may lead to lower recoveries. If there is a requirement for gDNA shearing, this should be performed after the SFE size selection.
2. DNA Mass: The use of between 3 and 10 μg of gDNA is recommended. A mass <3 μg is not recommended as recovery will be too low for sequencing.
3. Buffer: We advise that samples are in TE buffer for long term storage. Other buffers may also reduce the efficiency of the size-selection process.
4. Homogeneity of Sample: Homogeneity is essential for effective size selection, especially for HMW gDNA. To check homogeneity, take Qubit measurements from the bottom, middle, and top of the sample. If readings are inconsistent (e.g. >20% CV) incubate the sample at 50°C with gentle agitation or mix gently using a wide-bore pipette. Ensure the entire sample volume is mixed, as pellets can settle at the bottom of the tube.
5. SFE viscosity: The SFE buffer is viscous. Ensure thorough mixing of the whole volume of the SFE buffer with a pipette at least 10–15 times before use. Ensure that the buffer is at room temperature before adding to the DNA sample.
6. Centrifugation and aspiration of supernatant: The centrifuge should be set to 22°C, and samples not added to the centrifuge until this temperature has been reached by the centrifuge.
The pellet obtained following the centrifugation step may be difficult to detect. To aid visualisation of the pellet, orient the tube hinge outwards in the rotor during centrifugation so that the expected location of the pellet is on the side of the hinge (Figure 1). Aspirate the supernatant from the opposite side of the hinge, to avoid disturbing the pellet (Figure 2).

Figure 1: Place the hinge side of the tube facing outwards, before centrifugation. Ensure that the orientation of the tube is maintained for all the centrifugation steps and carefully handle the tubes when removing from the centrifuge.
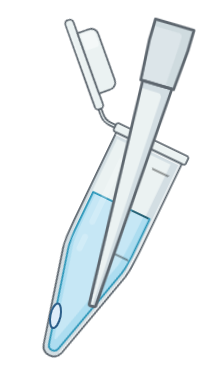
Figure 2: After centrifugation, the pellet may be invisible, take care to pipette from the opposite side of the tube to avoid disturbing the pellet. The pellet will be located on the hinge side of the tube, towards the bottom on the side of the tube.
Aspirated supernatant should not be disposed of, but kept in a new 1.5 ml eppendorf tube and labelled accordingly. The supenatant needs to be re-centrifuged to maximise gDNA yield.
Method
1. In a 1.5 ml Eppendorf DNA LoBind tube, prepare 10 µg DNA in 100 µl of TE buffer (10 mM Tris-HCl, 1 mM EDTA, pH 8.0) to a final concentration of ~100 ng/μl.
Note: Label your sample tube as "tube 1" for tracking.
2. Ensure the Short Fragment Eliminator (SFE) buffer is at room temperature. Then pipette mix the buffer thoroughly, at least 10–15 times, using a wide bore pipette tip.
3. Add an equal the volume (100 µl) of Short Fragment Eliminator (SFE) buffer to the DNA sample in "tube 1".
4. Using a wide-bore tip set to 200 μl, slowly and gently mix 10–15 times to thoroughly mix the SFE buffer with the sample.
Ensure that the solution is homogenous before proceeding to the next step.
Important: The pellet might not be visible after spinning, so it's essential to maintain the correct orientation of the tube to avoid accidentally disturbing the pellet in the following steps.
5. Place the tube in the centrifuge with the tube hinge facing outward, and add the appropriate tubes to balance the centrifuge.
Ensure proper tube orientation before starting and that the centrifuge is at the correct temperature prior use.
6. Centrifuge the sample at 10,000 x g at 22°C for 30 minutes.
Note: Ensure that the centrifuge is at the correct temperature prior use.
Tip: The pellet may not be visible but it will be located on the side of the tube that was facing outwards during centrifugation. It is important to not remove the full volume of the supernatant and leave ~15–20 µl to ensure the gDNA pellet is not disturbed. The remaining supernatant will be washed out in subsequent steps.
Important: Ensure you keep the volume of the aspirated supernatant and store it in a separate 1.5 ml Eppendorf tube. This is used in subsequent steps for re-centrifugation to maximise yield.
7. Using a narrow bore pipette tip, slowly and carefully remove most of the supernatant (leaving ~ 15–20 μl behind) by aspirating from the opposite side of the tube from the location of the pellet, and store the removed supernatant in a clean 1.5 ml Eppendorf tube. Take care not to disturb the DNA pellet.
Label your tube with the saved supernatent as "tube 2" for tracking.
8. Repeat the centrifugation and DNA pelleting steps for the retained supernatant in "tube 2" to maximise DNA yield:
• 8.1. Place "tube 2" in the centrifuge with the tube hinge facing outward, and add the appropriate tubes to balance the centrifuge.
• 8.2. Centrifuge "tube 2" at 10,000 x g at 22°C for 30 minutes, ensuring that the centrifuge is at the correct temperature prior use.
• 8.3. Using a narrow bore pipette tip, slowly and carefully remove most of the supernatant (leaving ~ 15–20 μl behind) by aspirating from the opposite side of the tube from the location of the pellet.
Note: The supernatant from the secondary centrifugation step will contain only short fragments of gDNA and can be discarded.
9. Perform an ethanol wash to your sample tubes containing your DNA pellets in ~15–20 μl ("tube 1" and "tube 2"). To each tube:
• 9.1. Slowly add 200 μl of freshly prepared 80% ethanol to the tube, without disturbing the pellet (we recommend dispensing on the opposite side of the tube as your pellet).
• 9.2. Centrifuge the tubes at 10,000 x g for 3 minutes ensuring the same tube orientation used in for the previous centrifuge step (hinge facing outwards).
• 9.3. Using a narrow bore tip, slowly and gently aspirate the supernatant from the opposite side of the tubes, taking care not to disturb the pellet.
Note: After the first ethanol wash, the pellet may become more visible (as a white pellet at the bottom of the hinge-side of the tube):
- If the pellet is visible, then carefully discard as much of the ethanol as you can.
- If the pellet is not visible, leave behind ~20 μl volume of supernatant to avoid inadvertently aspirating or disturbing the pellet.
Tip: To protect against loss of DNA by inadvertent aspiration of pelleted DNA, the aspirated supernatant should be stored in a separate 1.5 ml Eppendorf tube, labelled accordingly for tracking and stored in the fridge.
10. Repeat the previous step (step 9) for a total of two ethanol washes, for both sample tubes ("tube 1" and "tube 2").
Note: After the second ethanol wash, the pellet in the tube should be clearly visible in most cases and the residual ethanol can be carefully discarded using a 10 μl pipette, taking care not to disturb the pellet.
11. Elute the gDNA from each sample tube ("tube 1" and "tube 2"). Add 50 μl of TE buffer (10 mM Tris-HCl, 1 mM EDTA, pH 8.0) to each tube, and pipette mix using a wide-bore tip.
12. Incubate the tubes in a in a thermomixer set to 300 rpm at 50°C for 30 minutes. Gently agitate the solutions by flicking every 5 minutes to aid with resuspension.
Optional: If necessary, the pellet can be left overnight to elute at room temperature.
13. Gently mix the tubes contents by pipetting up and down using a wide-bore tip, and combine the contents of "tube 1" and "tube 2" prior to downstream quantification and processing.
14. Quantify your sample three times using the Qubit dsDNA BR Assay Kit. Ensure the replicate Qubit measurements are consistent before continuing to the next step.
Tip: We suggest taking a reading from the top, middle and bottom of the sample tube to test for homogeneity.
Note: The Qubit readings for your sample should be consistent. If they are not, perform the following steps:
- Additional mixing steps/agitation of the sample with a wide-bore tip.
- Additional mixing and elution steps in a thermomixer set to 300 rpm at 50°C for 2 hours.
- Mix the whole volume of the DNA sample with wide-bore tip at the end of the incubation before taking Qubit readings from the top middle and bottom of the sample to confirm homogeneity.
Change log
| Version | Change |
|---|---|
| v4, Aug 2025 | Corrected TE buffer formulation to (10 mM Tris-HCl, 1 mM EDTA, pH 8.0) - Was 0.1 mM EDTA |
| v3, Apr 2025 | The word 'Expansion' was replaced with 'Kit'. |
| v2, Jan 2025 | Updated document title and methodology: Includes additional tips and considerations before starting method. Additional steps to the preparation for result consistency. |
| v1, May 2022 | Initial publication |


